Contact
Home |240Z Mechanics| |Patents| |Art| |Recipes|
 BioPatent
Communications
Contact Me for Discussions About Arts,
Technology, and Culture (Blog Me/Pod Me).
BioPatent
Communications
Contact Me for Discussions About Arts,
Technology, and Culture (Blog Me/Pod Me).
|
Build a Pond
|
ContactHome |240Z Mechanics| |Patents| |Art| |Recipes| |
|
STAY CENTERED
I previously had a raised flower bed in my back yard that was uninteresting and raised mostly weeds. I had wanted a small pond for some time, so I got started on the project. The pond was to have a main body with alcoves to place plants, a filter chamber, a cascade of filtered water and a short retaining wall to define the pond garden area.
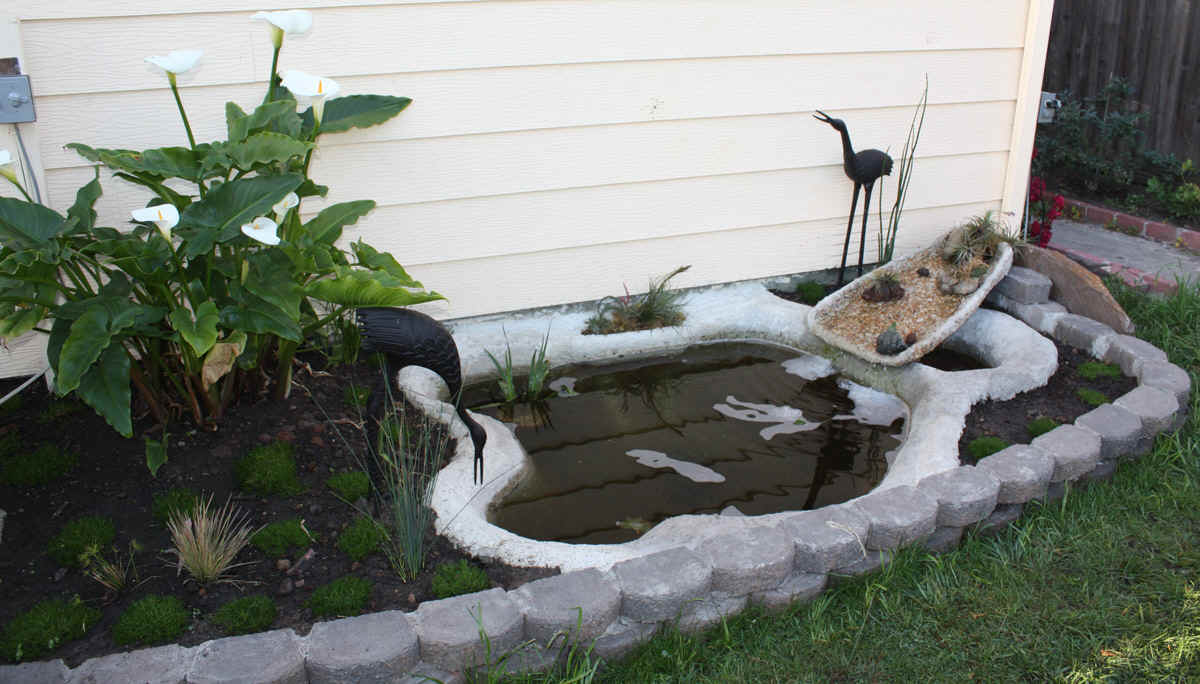
I had a large pond at my previous house and it had several problems. For example, the filter was in a large garbage can and needed to be hidden from view; the pond filter pump was often difficult to prime; if a hose of the filter system sprang a leak, the filter pump would drain the entire pond; when the pond was being cleaned, there was no good place to put the fish; the course concrete walls often cracked and developed leaks; and bottom water often became stagnant. The pond design on this page includes a sunken filter chamber with a submersible pump fed from the bottom of the main pond through an outlet pipe that does not allow the filter to drain the whole pond. The filter chamber can act as a holding tank with aerated circulating water for fish during cleaning. The pond is reinforced concrete lined with stucco to minimize cracking.
The basic pond design includes main pond chamber 1 with water flowing from the pond bottom to the top of filter chamber 2 through pond outlet 3. Water flows through filter 4 by gravity to be picked up by submersible pump 5 and transferred through filtrate hose 6 to aerating cascade 7 and back to the main pond. The pond outlet 3 picks up the bottom water (lower in oxygen and higher in debris) and raises it up to the top of the filter. Notice that even if the filter runs dry, the pond will retain a water level at least to the top of the outlet tube.
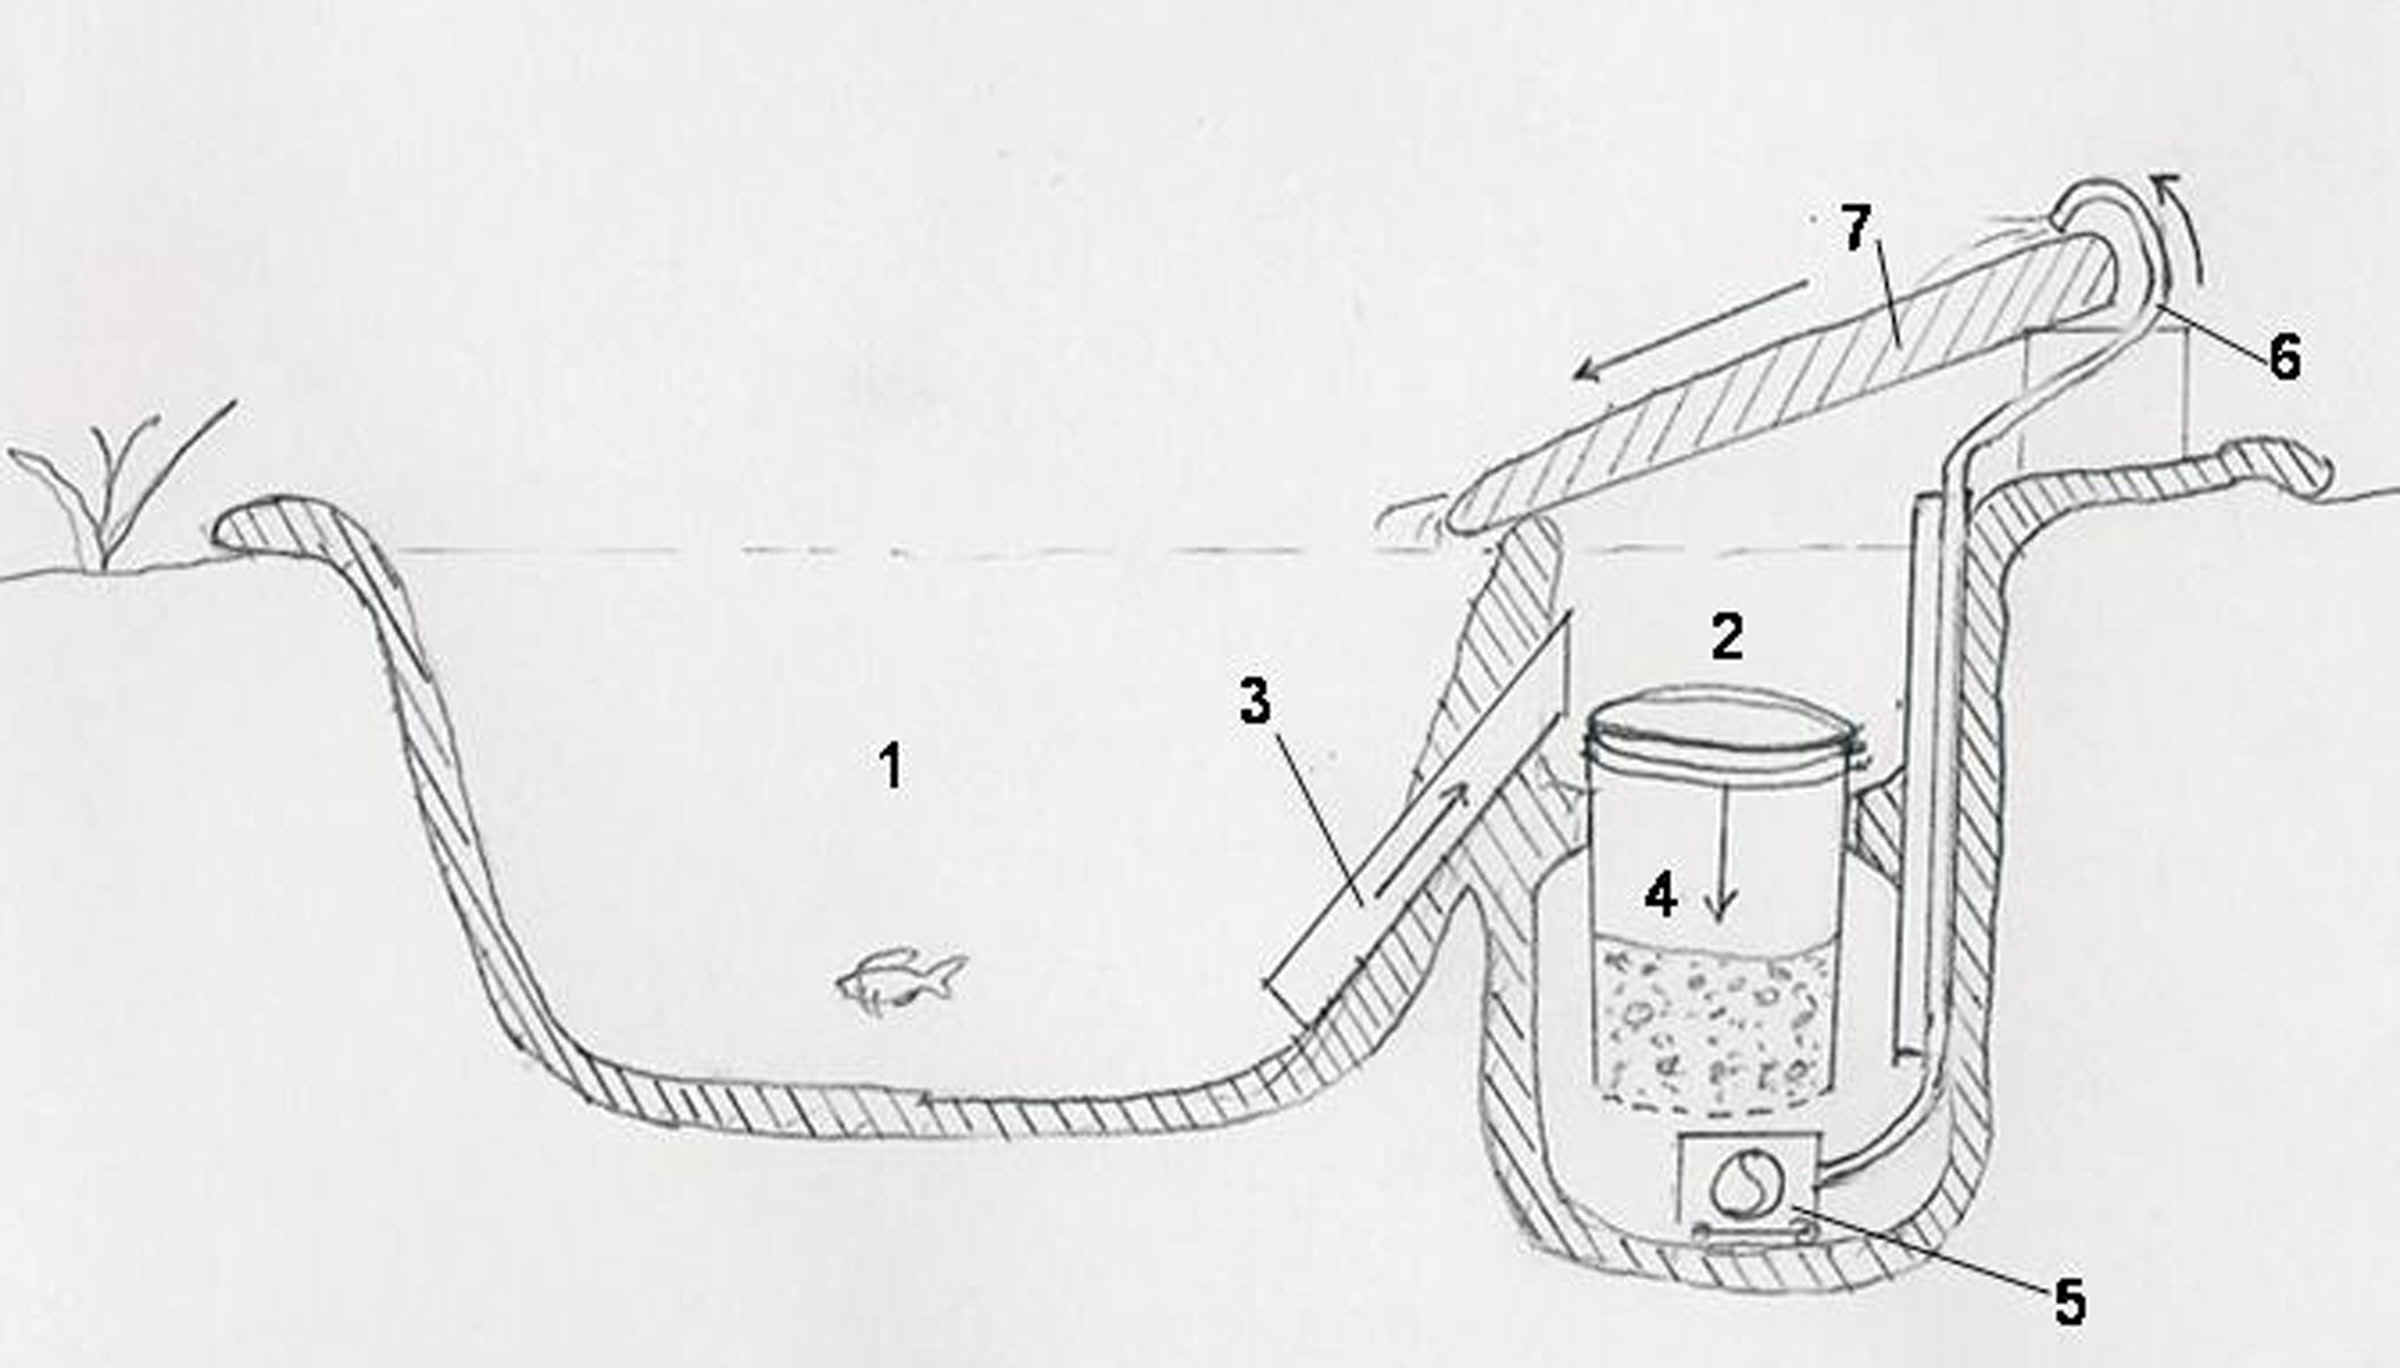
The filter element is a commonly available 5-gallon plastic bucket with holes drilled in the bottom and half filled with a mixture of pea gravel and course sand. When I want to clean the filter media, all I have to do is pull out the filter element bucket by its handle and rinse the sand and gravel with a hose. The filter element bucket seats and seals in a ring made from the top part of an identical bucket, as shown below. The submersible pump sits in the bottom of the filter chamber, usually under water, so there is no problem with priming. Even if the filter becomes clogged, enough water drips down to keep the pump wet so it does not burn itself out. I have plenty of warning that the filter is getting clogged because bubbles start to appear in the filtrate stream (visible through the translucent silicone filtrate hose) when the filtrate flows slower than the pump flow.
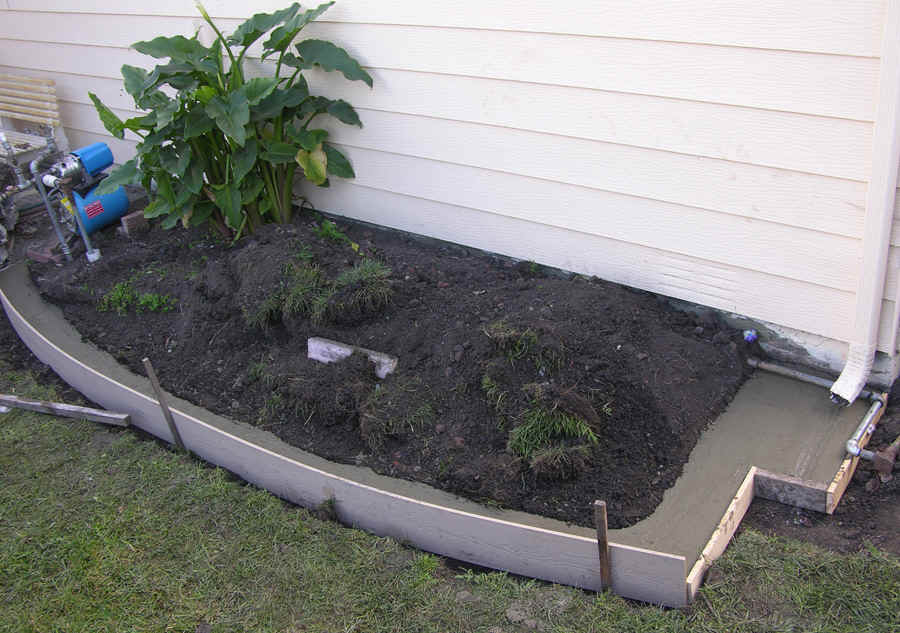
The first step in building my pond was to provide a good foundation for a low retaining wall enclosing the pond environment. As shown below, the outside of the wall foundation was defined by forms I arranged in the shape I wanted. The inside of the foundation was defined by a wall of dirt from the old flower bed. I mixed the concrete from 60 pound sacks of dry mixed "Quickrete" and water in a wheel barrow. I retained the calla lily plant because it is so attractive and well suited to the pond environment. Next, I mortared retaining wall bricks to the foundation.
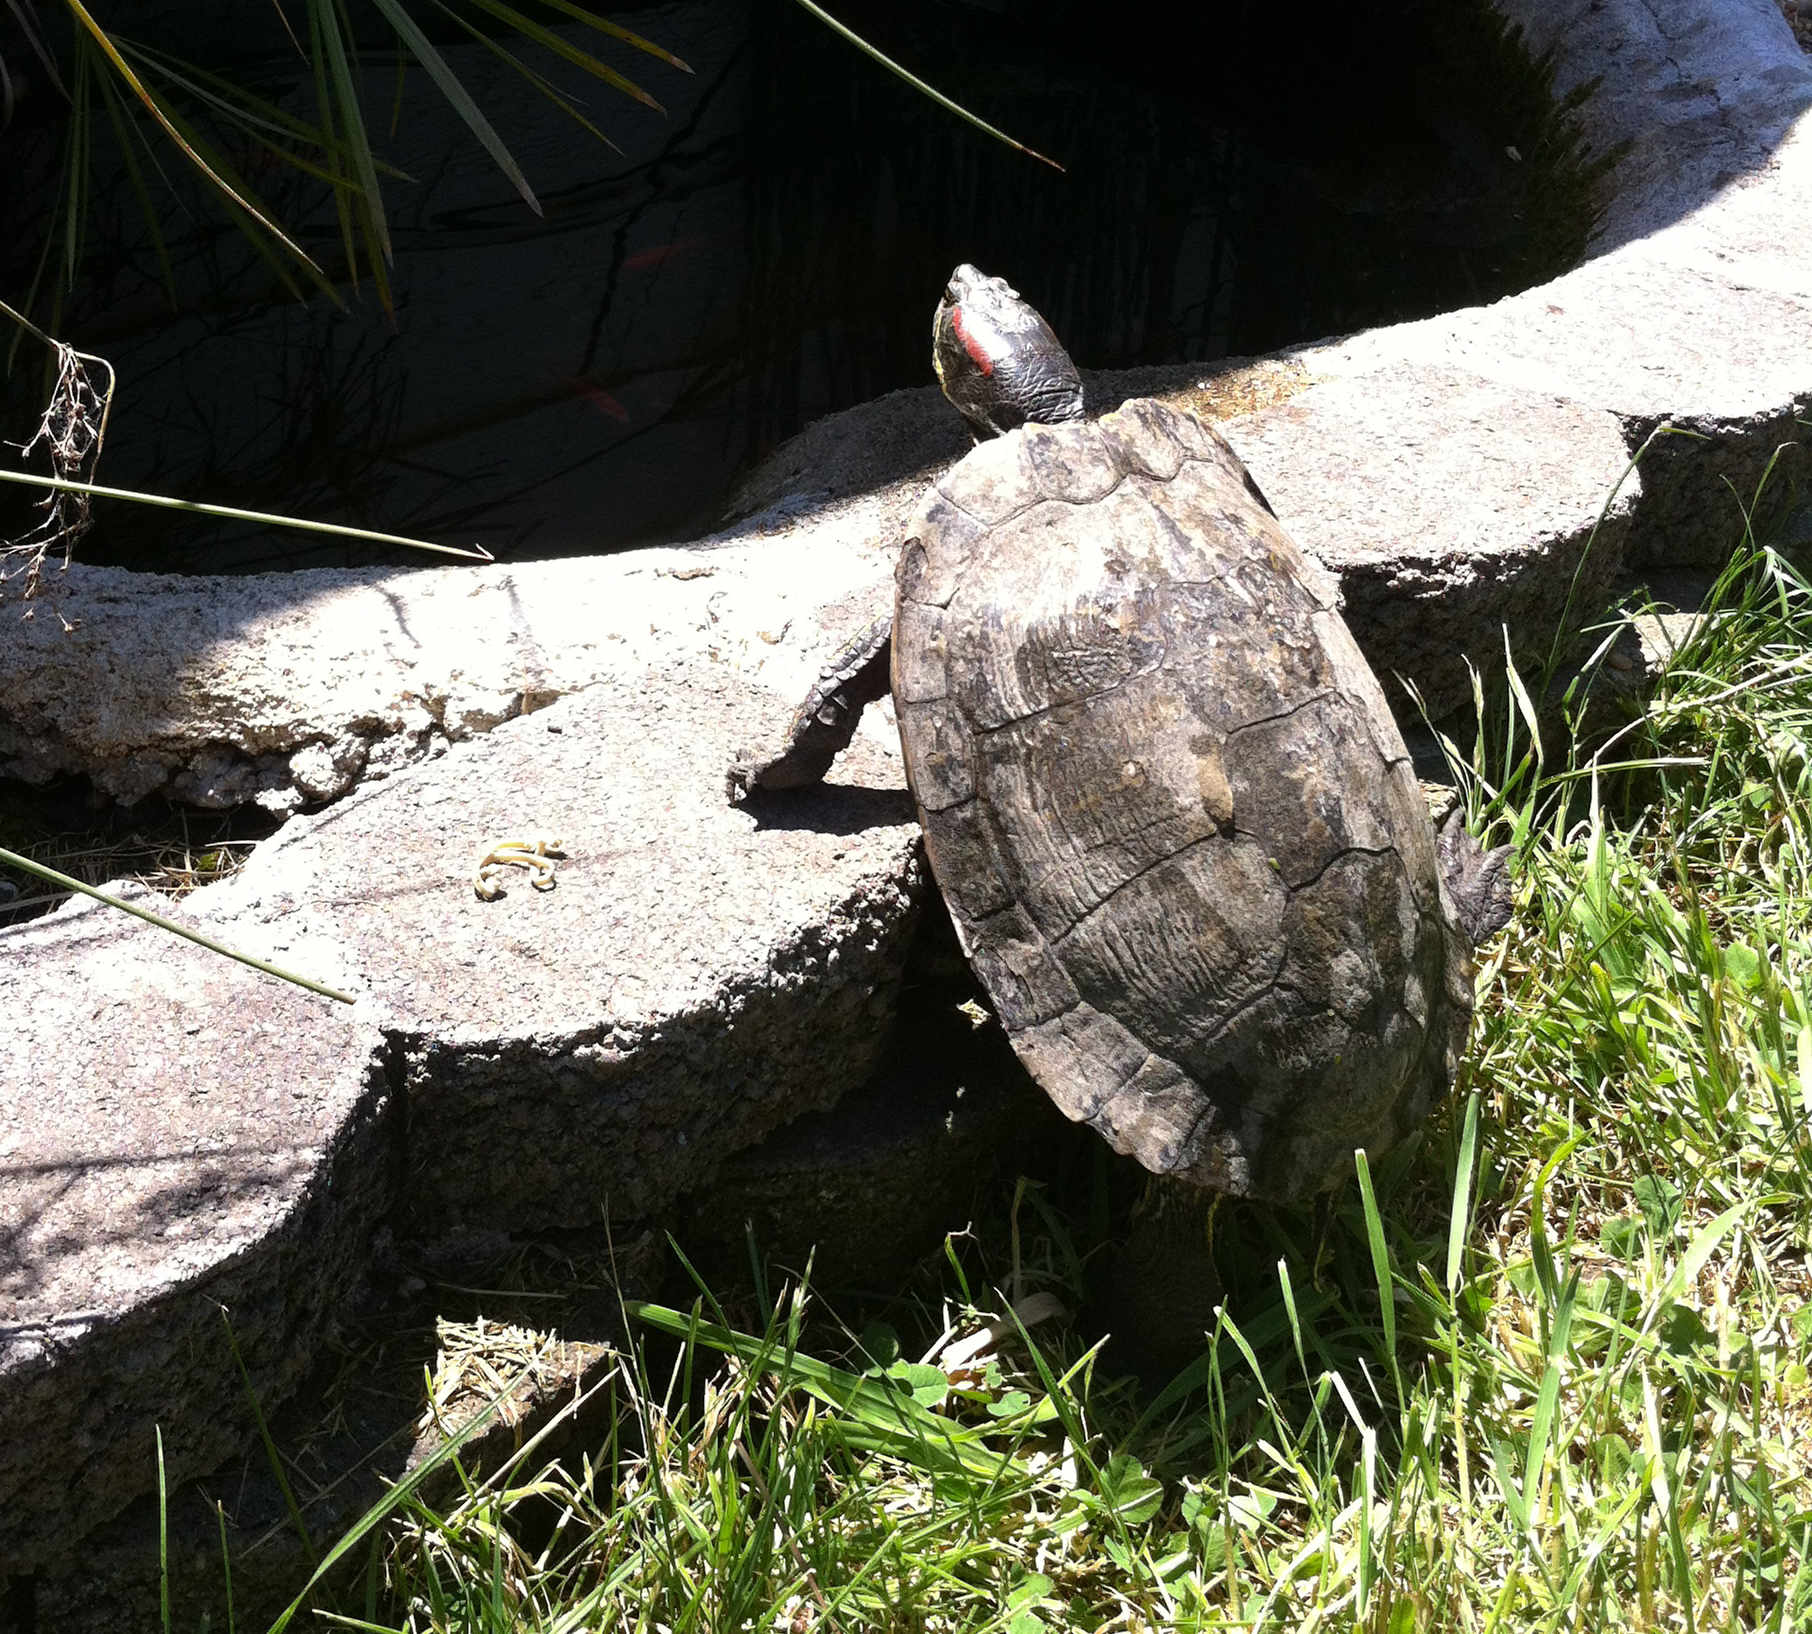
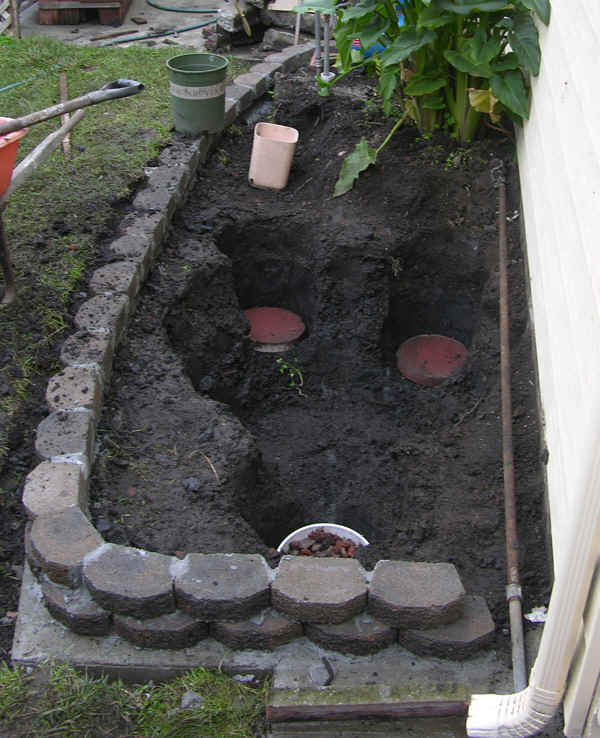
I dug a pit the general shape of the pond I desired. I made the pond fairly deep to discourage raccoons and egrets from eating the fish. My soil is black clay, so I could make steep walls of what ever shape I chose. I smoothed the walls and built up the edges with handfuls of wet mud. I routed a power line and garden water pipe along the back of the pond. I lined the mud pond with chicken (stucco) wire and concrete reinforcement mesh to support the concrete layer to be applied next.
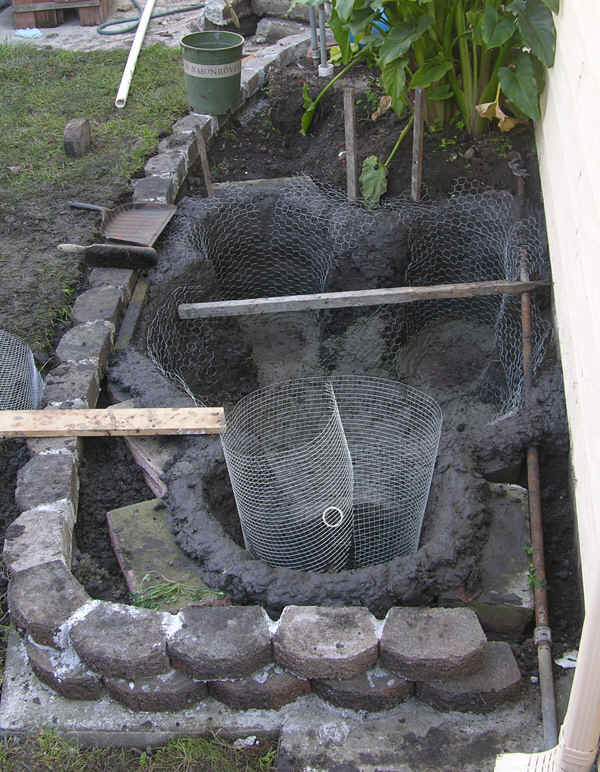
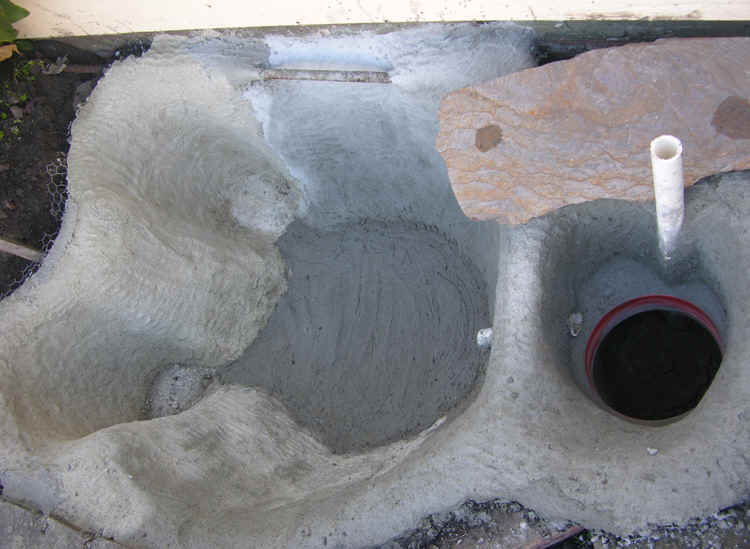
Just as I had coated the original hole with a layer on mud, I laid down (handful by handful - use flexible latex gloves to protect your hands) a layer of general purpose concrete over the mud layer and reinforcement wire. For side walls, I mixed the concrete with less water so it would be stiff enough to stay in place while it cured. After the concrete layer hardened and cured (at least a day), I covered it with a layer of stucco (handful by handful). The wall between the main pond and filter chamber was formed extending a bridge of folded wire mesh layers across the gap, filling in with concrete,then covering with a layer of stucco. The pond outlet pipe to the filter chamber was initially held in place by the wire mesh bridge until it became cemented in place by the concrete and stucco. For a smoother finish, and to minimize leaks, a final thin coat of more watery stucco was smeared across all surfaces of the pond.
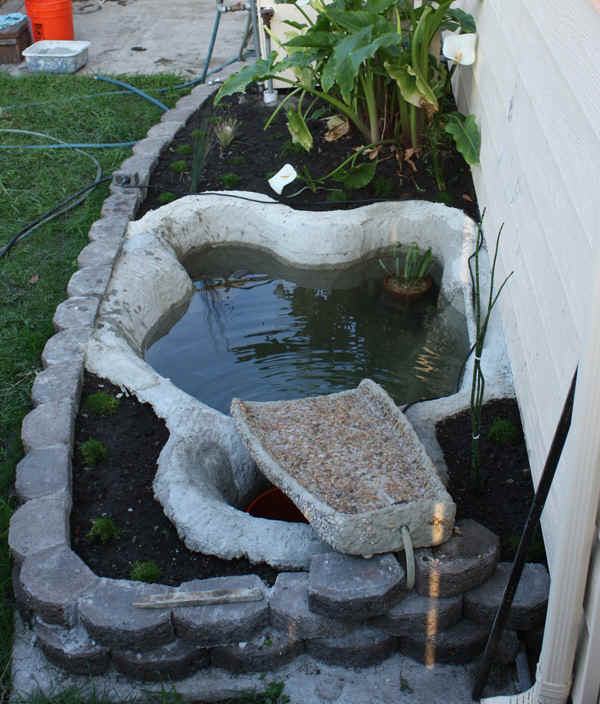
To make the sealing seat for the removable filter I cut the top 6 inches off a 5 gallon bucket, removed the wire handle, wrapped the outside with reinforcement wire, and wired bucket top into position in the filter chamber. The bucket top sealing ring was then cemented permanently in place with concrete and stucco. A perfect seal is created when the removable pond filter unit (itself a 5 gallon bucket) is seated down into the cemented bucket top seal (see orange ring below at the right). To the left of the orange filter seal in the photo below is the pond outlet pipe that lets water into the filter from the main pond. Above the orange seal is a vent tube that vents the lower filter chamber, allows a power cord to power the submersible pump, and provides a path for an outlet hose to transfer filtered water from the pump to the aeration cascade.
After the concrete and stucco was cured, the pond was filled up with water. Well water is good. City water must be treated to neutralize chlorine or chloramine, if the pond is to have fish. One way to find leaks is to let the pond leak until it stops at some level - this is the bottom of the leak, and there is no leak below it. Look all around the water edge for a hole or crack. Once leaks are found, it is easy to seal them with more stucco.
I made the aerator cascade by shaping reinforcement wire mesh in the desired shape. I put a layer of concrete under the mesh on a plastic sheet, then sealed the mesh with a thin top layer of concrete. After the concrete cured, I covered the upper parts of the cascade with stucco and embedded some pea gravel for texture and visual appeal.
The pond is about 250 gallons (4 x 4.5 feet and 2 feet deep) with a 14 gallon filter chamber. The walls are about 3 inches thick with 1.5 inches of reinforced concrete and 1.5 inch layer of stucco. The submersible pump is a 3 x 3 x 2 inch fountain pump (120 v, 0.3 amp, 40 W) that seems to pump about 5 gallons per minute. So the filter cycles through the pond volume about once an hour. The pump is provided ground-fault interrupted power through a buried Romex power line to an outdoor rated outlet. I could put in a timer, but I flip the power switch to run the filter about 8 hours a day.
The first water fill of the pond was pretty alkaline from the fresh concrete, so drained it and filled the pond with fresh water before adding any fish. As soon as I added pond plants, I had frog eggs stuck to them. Of course mosquito larvae showed themselves within days. Small gold fish can eliminate them. Water snails are a good idea to help keep down the surface algae.
Contact me Baker@BioPatent.com
Return to BioPatent Home:Return
|
Bakerman Podcast| |240Z Renewal Page|
|Trademarks| |Air-conditioning Repair|
|240Z Performance Mods|
|Patent and Trade
Secret Page|
|240Z Engine Rebuild|